FFXIV is sometimes called a theme-park MMORPG, and I definitely think of the Gold Saucer as being part of the carnival. Alongside the dramatic events on the big stage, there are prize counters, flashing lights, and arcade games everywhere.
These arcade machines in the Gold Saucer are fun little skill-testing games to challenge yourself with. They’re a side attraction to help pass the time while waiting for a party to fill, duty to pop, or GATE to start.
In this article I’m going to give you some minigame tips I’ve picked up from my many hours lounging in the Gold Saucer. Even if it’s all for fun, I still get enjoyment out of improving at something, and conquering each of these minigames can be quite satisfying.
Minigame Rewards
While much of FFXIV’s activities offer you a worthwhile reward for the time investment, minigames at the Gold Saucer don’t have anything so enticing. They’re one of the few pieces of content that I think you just play to have a bit of fun passing the time.
Sure, they do reward you with MGP, but compared to other activities, the amount you get from minigames is kind of piddly. I think of the MGP reward as being more like a high score table at an arcade. It’s a personal challenge to do well, but it doesn’t give me a lot of practical benefit.
If you’re looking to farm MGP for a big ticket item, you’ll see more success from doing GATEs which run every 20 minutes at the Gold Saucer. Check out my GATE guide for the schedule as well as tips on how to do well at each of the different events. You can also find a general overview of MGP sources in this post over at Basically Average.
Minigame Strategies
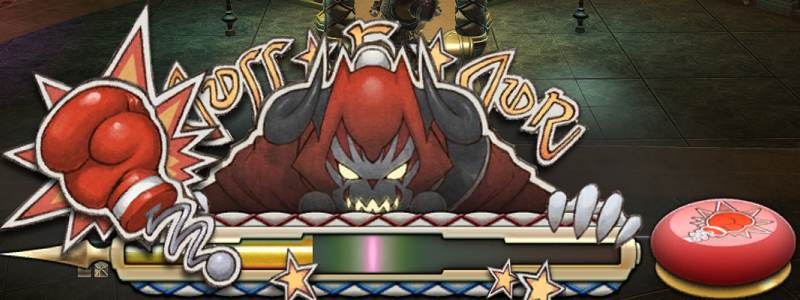
The Moogle’s Paw
The Moogle’s Paw minigame is located on the Northeast side of Event Square, right next to the Aethernet Shard actually. It’s also my favourite Gold Saucer minigame, and I often play it after jumping off the stage from playing The Slice is Right or Any Way the Wind Blows. It costs 1 MGP to play and you earn 10 MGP for grabbing one of the blue balls, or 25 MGP for grabbing the red ball.
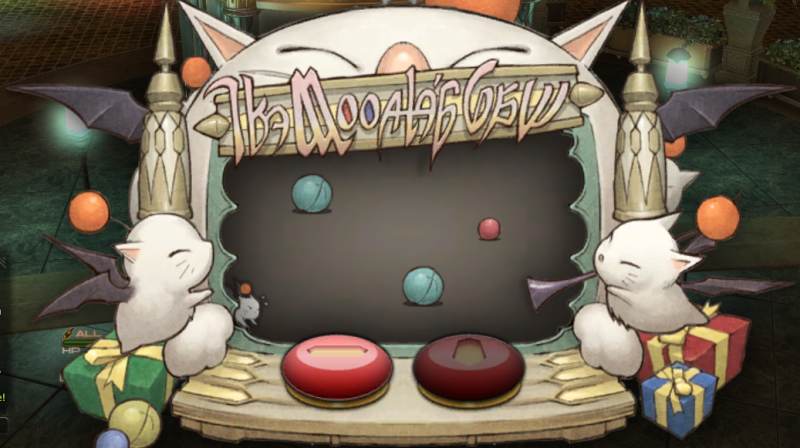
The way it works is you have 15 seconds to position your Moogle on a horizontal axis and a vertical axis. First press and hold the lefthand button to position your Moogle on the horizontal plane, and then press and hold the righthand button to place it along the vertical plane. The Moogle drops where you leave it, and if it lands on top of a ball then you’ve won.
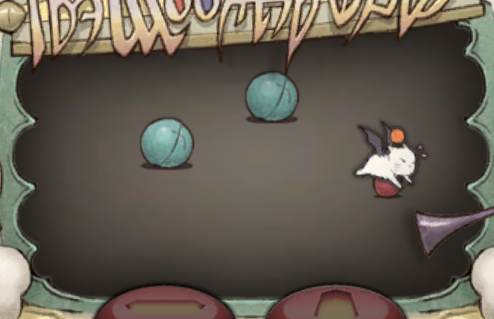
It might seem tough, but I find it’s actually not too bad once you know where you want the Moogle to land in relation to the ball. Compared to other minigames, the muscle control is on the more lenient side. I’m only going to show you how to grab the red ball, because it’s easy enough that I never go for the bigger blue ones anyway.
For the horizontal placement, you’ll need to rely on your peripheral vision to keep both the ball and the Moogle in your view. Try focusing on the Moogle’s orange pom instead of his fluffy white body. The pom is a smaller, more accurate target, and it needs to be placed just past the center of the red ball.
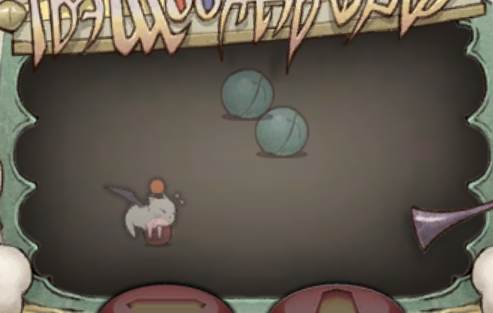
For the vertical placement, it’s confusing at first since you might think you need the Moogle to be covering the ball. You actually want the ball to be just below the Moogle. It should look like it’s laying on top, or clutching it with its adorable little legs.
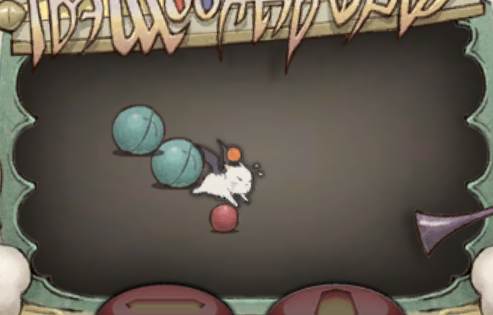
If you can’t see the red ball, or if your Moogle looks like it’s floating above without touching the ball, you’ve probably missed.
Once you get the hang of it this is a very fast game to use to complete your weekly Challenge Log, and it’s near the Event Square stage so you might be passing by anyway.
Cuff-a-Cur
The Cuff-a-Cur minigame is located on the West side of Event Square, but is easily accessible from the main Aetheryte Plaza. It costs 1 MGP to play, and you’ll be rewarded with 10, 15, or 25 MGP depending on your accuracy. In terms of muscle control, I find this minigame fairly difficult.
The way the game works is a yellow gauge continuously fills and empties the bar over time. Each time it empties, it slows down a little. Your goal is to stop the gauge as close to the middle as possible, and you have 15 seconds to hit the button.
The marker on the bar does look tighter than it is though. The small pink strip in the middle is the ideal target of course, but you still earn the BRUTAL!!! reward as long as you’re in the light green column immediately surrounding it. The gauge stops moving upon clicking the big red button, so if you’re hoping you can just hold it down and wait to release it, you’re out of luck.
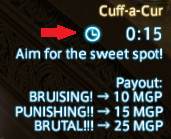
The biggest tip I have for Cuff-a-Cur is to wait for the timer to reach about 5 seconds. The bar slows down considerably over time, so you have a much better shot at landing a good punch if you let it slow down first. Of course, this means each play takes about 10 seconds longer than if you just threw a punch quickly. As long as you’re not trying to maximize your plays per hour or something, it’s much safer to just delay the punch.
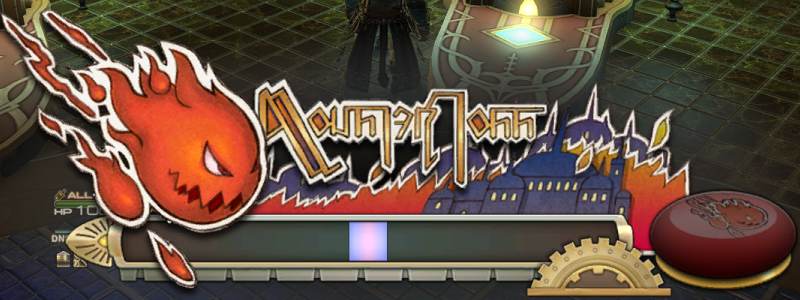
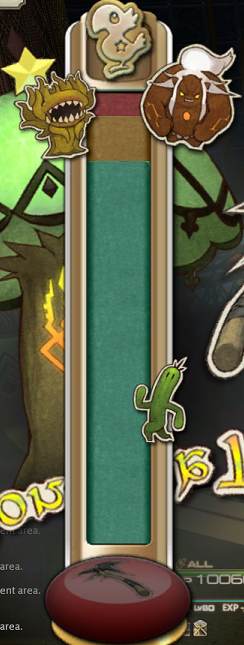
Monster Toss
In my opinion this is the hardest minigame at the Gold Saucer, and you’ll find it on the North side of Wonder Square. While it is more difficult, it also offers greater rewards if you’re skilled at it. It costs 1 MGP to play, but you could win 20, 30, or 50 MGP.
This is another gauge timing minigame, where you have a target zone on a bar, and a gauge moving back and forth. You need to hit the button and try to stop the gauge when it’s inside the target zone. After each press, the bar will reset with the target zone in a new location. You have 30 seconds, and each success earns you one point.
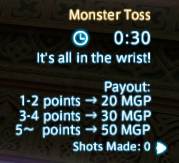
The reason this minigame is hard is that the gauge moves pretty fast the whole time, and the zone doesn’t have any ‘partial credit’ areas. You either land it or you don’t. When you begin, let the gauge pass a few times to get into a rhythm. You’ll need a sense of its movement since the speed of the gauge is different each game. The faster you can get a handle on the pace, the more points you’ll be able to get within the time limit.
If you’ve got the skills, this game can be fun and even more rewarding than some of the others here at the Gold Saucer. If not, it’s likely to leave you frustrated.
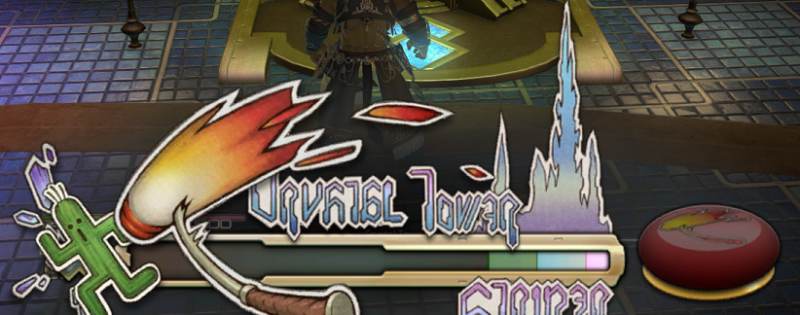
Crystal Tower Striker
On the south side of Wonder Square is the Crystal Tower Striker. It’s below the Mahjong tables. Masked Rose is nearby as well, so if you’re doing your weekly Fashion challenge, check out this easy game to cross off some Gold Saucer challenge log tasks while you’re in the area.
The way this game works is there’s a bar which fills and empties with a gauge, and you have to stop the gauge at the target location by pressing the button. It’s almost exactly the same as Cuff-a-Cur except the zones that you’re aiming for are on one end of the bar, instead of in the middle.
Somehow, I find this small difference makes me much better at Crystal Tower Striker, though I could swear the zones are about the same size. If you’re like me, you might have better results with this game even if you struggled with Cuff-a-Cur.
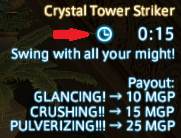
While there is a time limit of 15 seconds, the game gets easier the longer you wait. Much like Cuff-a-Cur, I recommend you wait for the gauge to slow down a bit to give you a greater chance of hitting the high score. Around 5 seconds remaining on the clock will give you better control.
Out on a Limb
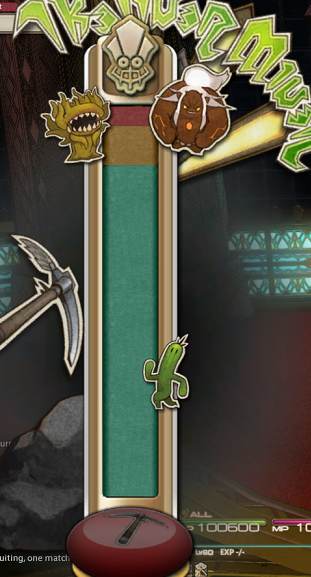
Probably the most complicated minigame in the Gold Saucer is Out on a Limb. It’ll be found in Minion Square, so you’ll want to take the Aethernet to get there.
The way it works is you first use a gauge to select a difficulty for the actual minigame. Stop the gauge in the green (Cactuar – easy), yellow (Morbol – medium), or red (Titan – hard) zone of the bar to choose. The difficulty affects the speed of the gauge and the amount of MGP you get for winning in the upcoming rounds.
For the meat of the game, you’ll see different display with a few components to take note of. There’s the number under your difficulty’s monster (e.g. Titan) which displays how many swings you have left on the current attempt, starting with 10. This resets when you double down. As long as you’re not swinging randomly as fast as you can, you should never run out of swings, so this can be mostly ignored.
The timer in the middle keeps track of how much time is left on your game. This doesn’t reset when you double down, and instead carries across rounds. It will help you decide whether or not to attempt the next round.
There are white and blue ticks on the dial. The white one moves along the meter and stops when you press the red button. The blue one shows you where your last swing landed, and you’ll use this as a reference for where you want to swing next. Your first swing should be somewhere in the middle to maximize the chance of hitting something.
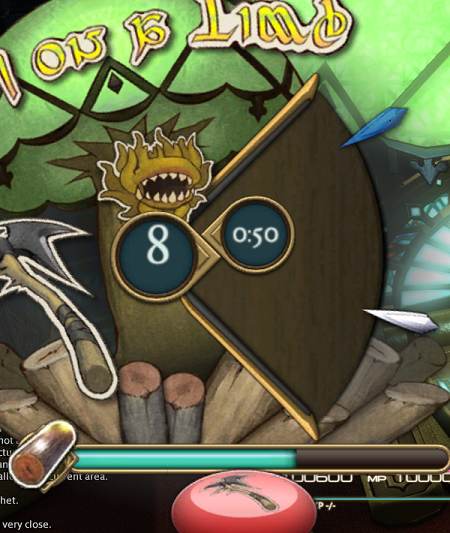
The green gauge with the picture of lumber shows you how much is left to gather (I think that’s the story anyway. Maybe it’s how much more stamina the tree has before it falls. Who knows. The lore behind this game is shrouded in mystery). ‘Good’ hits take a small amount off the gauge, ‘Great’ hits take a significant amount (a little less than half), and ‘Excellent’ hits completely empty the gauge.
As soon as you land a hit, adjust to try and find the sweet spot. If it was just a ‘Good’ hit, adjust moderately up or down. If it was a ‘Great’ hit, you have a couple options. If you don’t know which direction the sweet spot is in, you might want to aim for the same location again for a guaranteed big chunk of the gathering gauge, especially if your gauge is almost empty already. If you do know which direction to adjust, move only slightly in that direction, since you weren’t far off.
Let’s talk about the double down mechanic. Each time you reduce the gathering gauge to zero, you can claim your winnings and stop, or continue with whatever remaining time you have to multiply your payout. Doubling down is really efficient, but you take a bigger risk the lower the amount of time you have left.
You can double down up to five times for a total of six rounds. Strangely, it’s not exactly double payout each time, and the biggest jump in MGP payout happens if you can clear round four. Easy mode offers a maximum of 600 MGP, Medium lets you win up to 750 MGP.
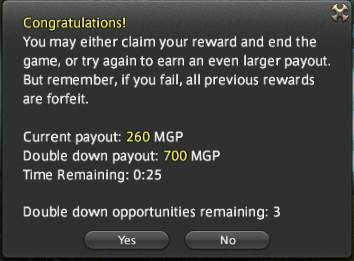
Personally I don’t think it’s ever worth doubling down with 10 seconds or less remaining. 10-20 is still risky, but if you’re experienced it’s not out of the question. Above 20 seconds is safe if you’re even a little bit familiar with the game.
Note that doubling down is actually riskier on Cactuar difficulty since the gauge moves so slowly. You’ll get fewer swings off because you’re waiting for the white tick to move, and the first couple swings have a good chance to turn up empty. You actually need more time remaining on the clock to have a real chance at finding the sweet spot. I’d say that even with experience, it’s no guarantee that 15 seconds will be enough. Steer clear of Cactuar if you already know how to play, and try to get those harder difficulties.
The Finer Miner
The Finer Miner is located in Minion Square across from the Out on a Limb minigame. Use the Minion Square Aethernet shard to get there.
First, you set the difficulty at the beginning by stopping the gauge in the green (Cactuar – easy), yellow (Morbol – medium) or red (Titan – hard) zones. The difficulty changes the number of swings you’ll get each round, as well as the amount of MGP you earn.
This game is a lot like Out on a Limb, so the same rules about the gathering gauge and doubling down can be found in that section. The Finer Miner does have a couple of notable differences though. Most importantly, the difficulty adjusts number of swings rather than speed of the gauge. Personally I find this game much harder than Out on a Limb, because with fewer swings you’re more likely to have a bit of bad luck ruin a run, regardless of skill.
The key is to make every swing count. Take your time, and don’t rush a swing on the first pass. I can almost never time the swing correctly if I try to get it the first time the orange circle expands. I found it most helpful to only swing after the first pass.
Additionally, I find the style of the gauge harder to use. This might be a personal preference, but it’s just more difficult for me to estimate the location of a growing and shrinking circle than it is a marker passing back and forth along a line.
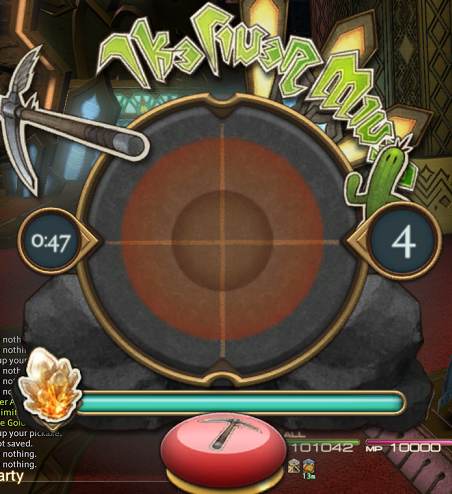
There’s a shaded circle after the first swing that indicates where your most recent swing landed. This can be really useful, but it only remembers the very last attempt. If you adjust your swing in the wrong direction, you suddenly have no helpful indicator anymore.
It’s important to focus on one point of the circle. The orange circle doesn’t move that quickly, so getting your target size is all about focus and remembering what size you’re aiming for on the next swing. If you know your next swing is going to be far away from your previous swing, pick a point and stare at it, since you won’t have a marker close by for reference. I usually do this before the shaded region from the previous swing disappears.
Between the limited swings and the circular visual marker, This game took me the longest to get the hang of, but I did manage to get at least a little bit more competent in the end.
Summary
I hope you picked up some helpful tips to improve your shots, swings, and throws at these minigames. Were any of these games too difficult to master? Let me know which of these arcade style minigames is your favourite down below.
Leave a Reply